
姿势识别及特征检测(Pose and Pose Landmark Detection)
Python 基础
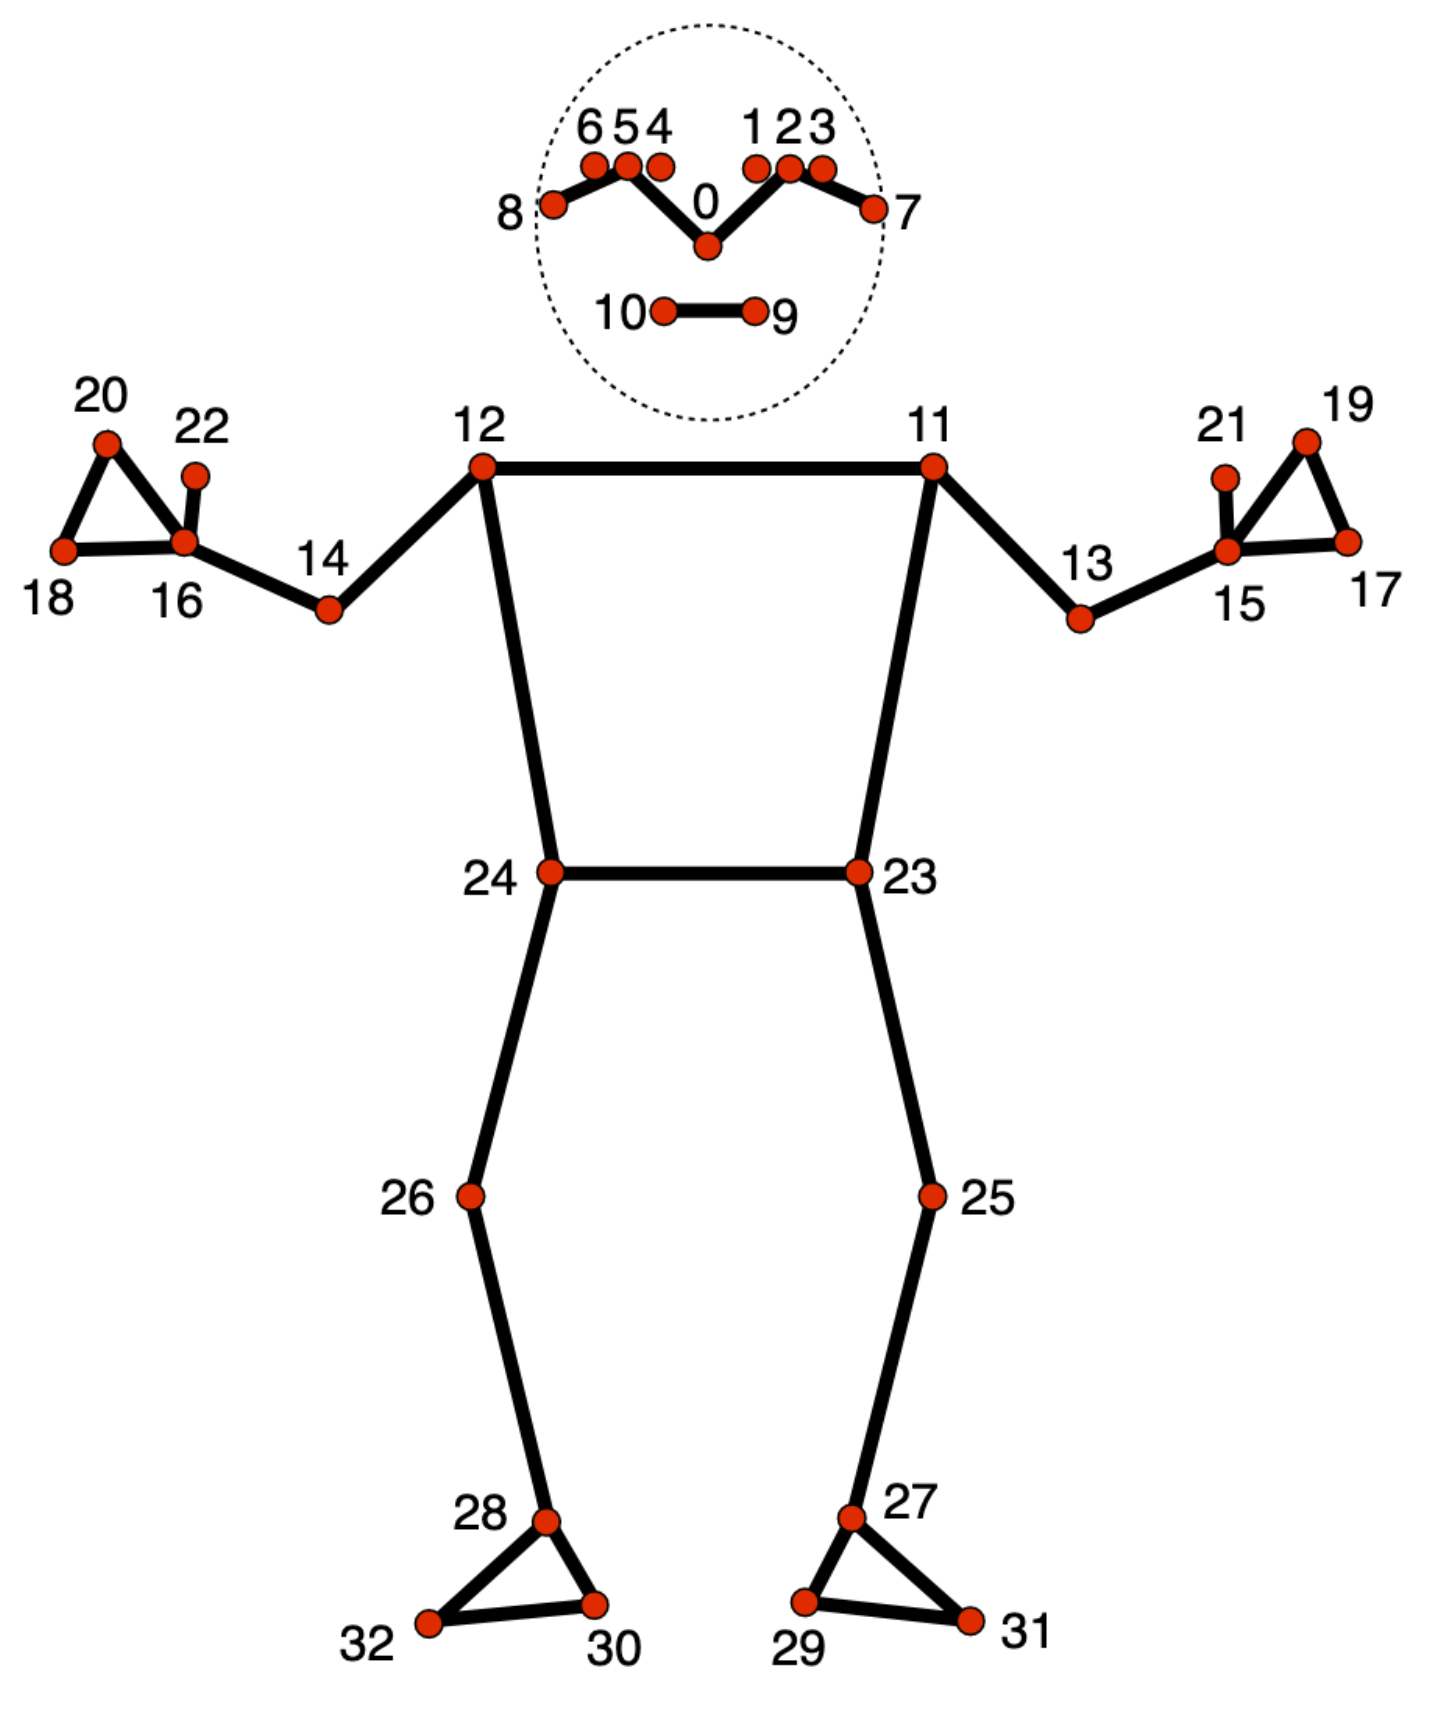
姿势点图片
代码 识别图片的姿势(pose_image.py)
(官方代码实例,有部分修改)
import mediapipe as mp
from mediapipe.tasks import python
from mediapipe.tasks.python import vision
from mediapipe import solutions
from mediapipe.framework.formats import landmark_pb2

import cv2
import numpy as np

def draw_landmarks_on_image(rgb_image, detection_result):
    pose_landmarks_list = detection_result.pose_landmarks
    annotated_image = np.copy(rgb_image)
    # print(annotated_image)
    # Loop through the detected poses to visualize.
    for idx in range(len(pose_landmarks_list)):
        pose_landmarks = pose_landmarks_list[idx]

        # Draw the pose landmarks.
        pose_landmarks_proto = landmark_pb2.NormalizedLandmarkList()
        pose_landmarks_proto.landmark.extend([
            landmark_pb2.NormalizedLandmark(x=landmark.x, y=landmark.y, z=landmark.z) for landmark in pose_landmarks
        ])
        solutions.drawing_utils.draw_landmarks(
            annotated_image,
            pose_landmarks_proto,
            solutions.pose.POSE_CONNECTIONS,
            solutions.drawing_styles.get_default_pose_landmarks_style()
        )
    return annotated_image

model_path = '/Users/binchen/project/mediap/task/pose_landmarker_full.task'
img_path = './image.jpg'


# STEP 2: Create an PoseLandmarker object.
base_options = python.BaseOptions(model_asset_path=model_path)
options = vision.PoseLandmarkerOptions(
    base_options=base_options,
    output_segmentation_masks=True)
detector = vision.PoseLandmarker.create_from_options(options)

# STEP 3: Load the input image.
# image = mp.Image.create_from_file(img_path)
# 这一步是官方的代码,在我自己的机器上面跑的时候,可能会碰到下面这样的报错
# 'Input image must contain three channel bgr data.‘
# 如果你碰不到这样的报错,那请直接使用官方的代码
#
# 这里是通过cv2 来构造 生成 mp.Image,与官方代码的 mp.Image.create_from_file 等效
cv_mat = cv2.imread(img_path)
cv2.imshow('Image Source', cv_mat)
cv2.waitKey(0)
image = mp.Image(image_format=mp.ImageFormat.SRGB, data=cv_mat)

# STEP 4: Detect pose landmarks from the input image.
detection_result = detector.detect(image)

# # STEP 5: Process the detection result. In this case, visualize it.
image_processing = draw_landmarks_on_image(image.numpy_view(), detection_result)


# 下面这行是官方代码,用来显示做了标记之后的图片,并且显示出来
# cv2_imshow(cv2.cvtColor(annotated_image, cv2.COLOR_RGB2BGR))
# 改造之后 使用 cv2.imshow直接来显示图片
image_target = cv2.cvtColor(image_processing, cv2.COLOR_RGB2BGR)
cv2.imshow("Image Target", image_target)
cv2.waitKey(0)
cv2.destroyAllWindows()